Starting today, users in the US & Canada will be able to use their iPhone 14 units to trigger an emergency SOS, even in areas without cellular coverage. It does this using a network of 24 low-earth orbit satellites that the iPhone can connect to. This allows you to send very short low-bandwidth emergency text messages to earth-based ground stations, which in turn get routed directly to either emergency responders or to Apple relay centers, which coordinate with emergency responders. While today’s launch is limited to the US & Canada, starting next month it’ll open up to certain countries in Europe (more on that in the next section).
At present, this feature is all about emergencies – and sending a selfie text message, or even a short ‘goodnight’ message doesn’t qualify. Instead, this is focused on routing you directly to first responders that can get you out of whatever pickle you’ve gotten yourself into. It’s roughly akin to other platforms that already exist today, such as Garmin’s inReach devices, or SPOT’s devices – both of which use satellites.
However, unlike those devices, this isn’t an extra thing you have to carry. Instead, it’s built into your phone. But, as you’ll see, that has both pros and cons. Even Apple themselves noted that if you’re planning on going deep off the grid in challenging terrain, this should be seen as one tool in your toolbox, but probably not the only satellite tool. Instead, the iPhone-based solution is mostly focused on casual out-of-coverage scenarios.
In my case, I was able to try the emergency platform for real, dialing 911 on a real phone to see how the system works – with real emergency responders replying, and real satellite systems sending the message.
Current Requirements:
There are two basic things you need for this system to work, the first is the phone, and the second is your location. Specifically, you need an iPhone 14 series device (any iPhone 14 variant). It does *NOT* need to be purchased in the US and Canada. The availability of the service is specifically tied to your current location, not where you bought your phone.
So if you buy an iPhone 14 in the Netherlands (where I live and buy my iPhones), and then travel to the US – your phone will work with this system upon landing in the US or Canada, today. The singular exception to this is iPhone 14 units purchased in China, Hong Kong, and Macau, which do not support the SOS system – because…China.
Next, there’s the coverage area. As of today, November 15th, 2022, that coverage area is:
– United States (inclusive of Hawaii, Puerto Rico, and the U.S. Virgin Islands – but not Guam or American Samoa)
– Canada
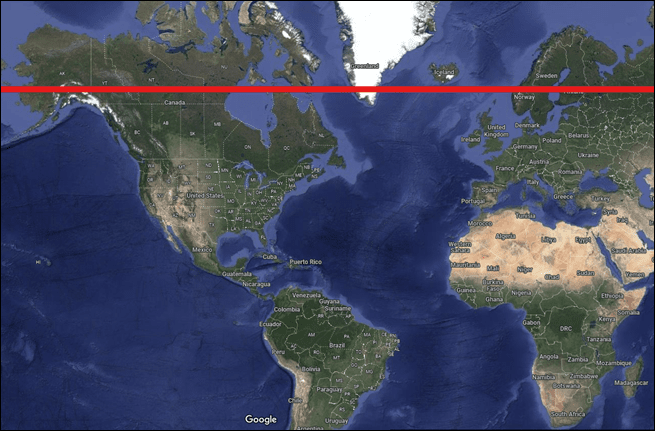
However, within that there’s also another restriction, which is that it doesn’t work well above 62° latitude. For reference, here’s that line:
Additionally, Apple says coverage on the water part is until it reaches international waters, then it’ll stop working. That part seems a bit perplexing to me since the coverage area doesn’t magically end there, but hey, them’s the rules. I suppose they’re trying to avoid an issue where they don’t have emergency response in place for the ‘right’ country.
Now, Apple says starting next month (December 2022), they’ll additionally roll it out to the following countries:
– France
– United Kingdom
– Ireland
– Germany
You may ask why not all countries in Europe? Well, merely having satellite coverage is only one part (these 24 satellites already cover much of the globe within the latitudes noted). But in addition to satellite coverage, they need to ensure the Apple relay centers that funnel the traffic to the local emergency responder system is set up as well. That includes everything from having people actually speak French, German, and any other language they’re supporting. And even the differences between Canadian French and France French (Canadian French is supported at launch for Canada, and then France French upon launch there).
In addition, that’s rolling out training for the thousands of PSAPs (Public Safety Answering Point) that receive emergency calls/texts in these countries. In the US/Canada alone there are 3,000 centers that handle emergency calls. Apple has already trained some 300 of those centers in the US/Canada with specialized training on how to handle routed text messages. While there are international standards in place for how this all works behind the scenes, Apple says they still want to have training be as widely available as possible to ensure smooth operation of everything. Of course, that’s basically going to happen via trial-by-fire starting today.
Triggering An Emergency:
First – note that this test was coordinated with Apple, specifically, they knew not to send rescuers to my location. But everything else is as-is, leveraging the real satellite systems for all communications, and I show where it works well, and where it struggles a bit. It goes without saying though that if you go through and dial 911 for realz, real people will show up to try and rescue you. So don’t do that unless it’s an actual emergency – instead, Apple specifically has a demo mode you can try that also uses the satellites for real, but doesn’t send the emergency responders, which I’ll also show later on in this post.
Got it? Good. Let’s cause some trouble.
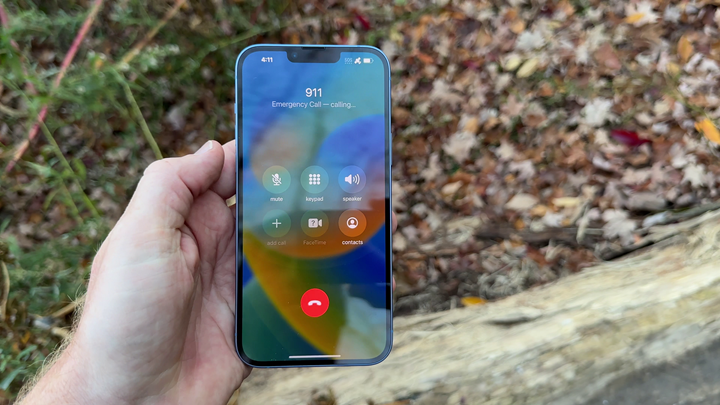
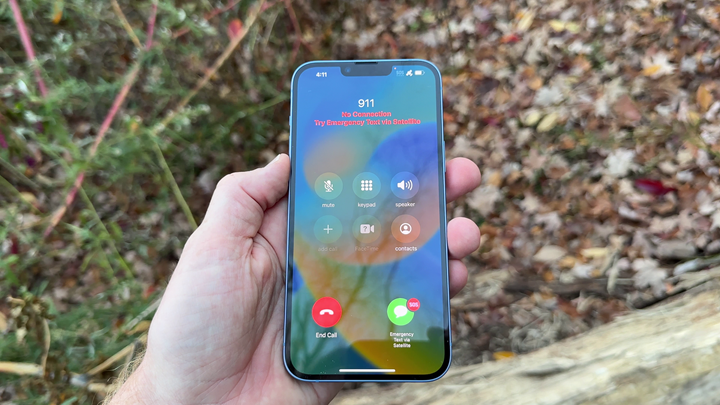
To begin, I dialed 911. That’s the only entry-point into the Apple SOS system. The reason is because dialing 911 on an iPhone actually does some interesting stuff in the background. Unlike a normal call to your friends, dialing 911 elevates the iPhone to go beyond your carrier’s cell towers. So, even if your phone says it doesn’t have signal – that means it doesn’t have signal from your specific carrier. But when you dial 911 (even today on an iPhone), it forces it to any carrier tower that might be nearby, regardless of your carrier plan.
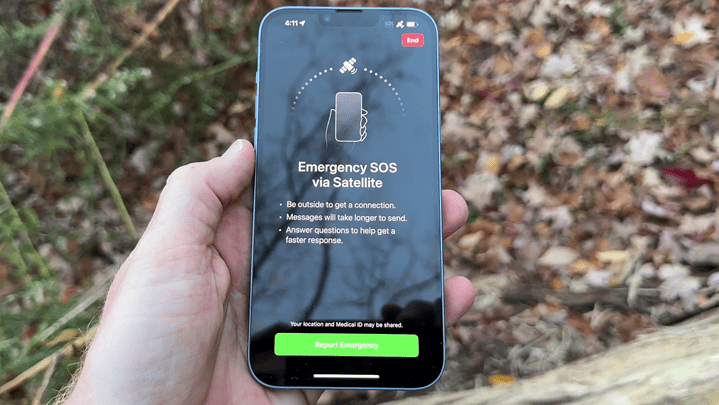
Assuming that fails, and you’re legit in the middle of nowhere, you’ll see an option to escalate to the SOS via satellite option:
Once you’ve done that you’ll see a new screen that confirms you want to trigger a satellite emergency:
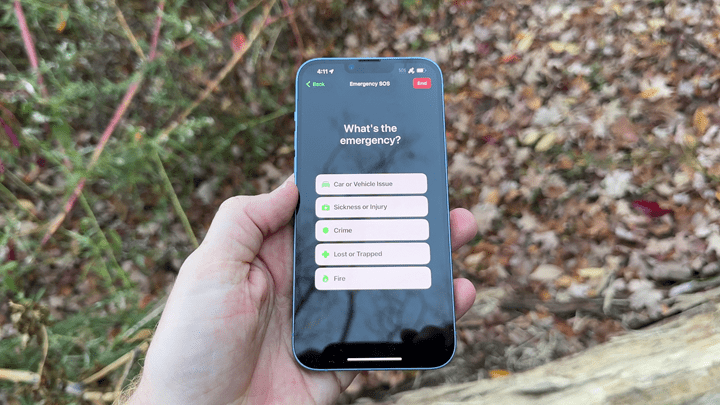
Next, you’ll get the first question, detailing what type of emergency it is. As you might expect, all of these questions were created in coordination with emergency services. During this first pass, I specified ‘Sickness or Injury’:
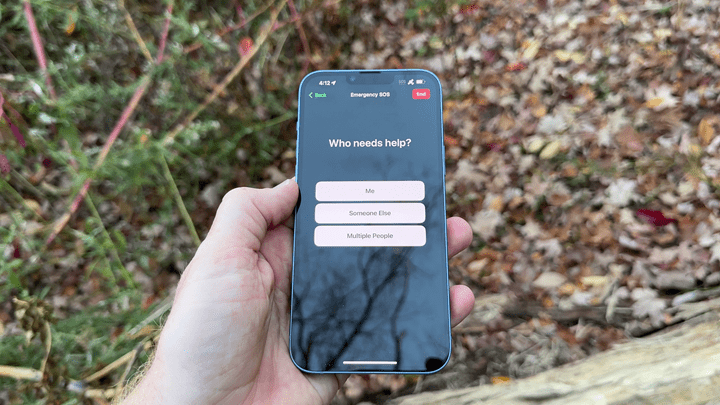
Then I specified for ‘Me’:
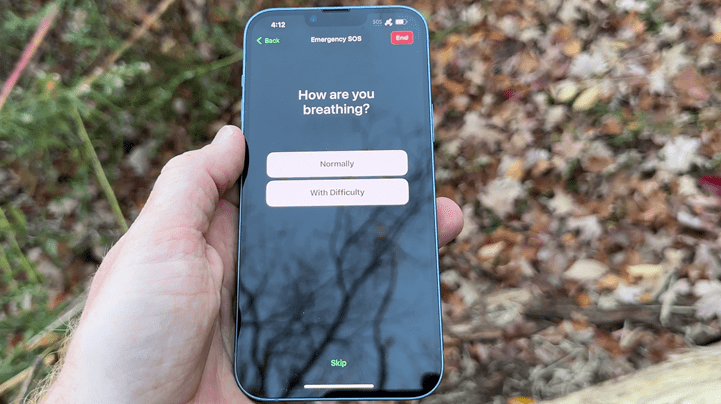
Then I said I was breathing normally:
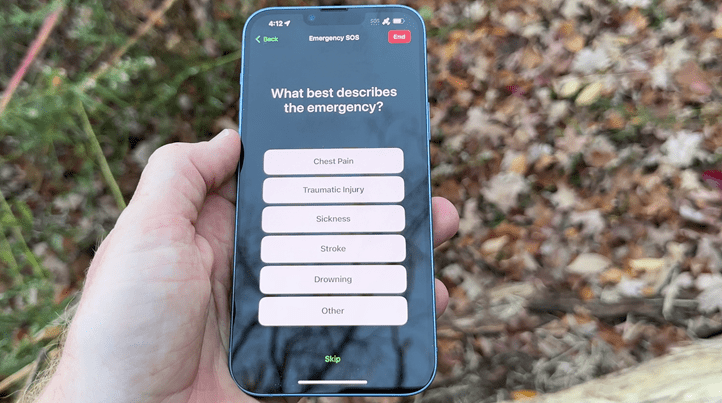
Next, it asked what type of emergency, for which I said “Traumatic Injury”:
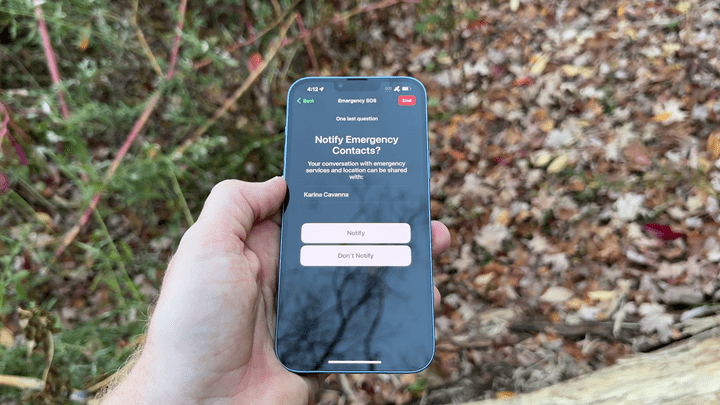
Finally, it’ll ask you if you want to notify emergency contacts (more on that in a second, it’s super interesting). In my case, they had set up a secondary phone that was predefined as my emergency contact. Note, you do need to set this up ahead of time. So, if you wait till you’re in the middle of nowhere without coverage it won’t work (trust me, I tried, I changed it…much to their initial chagrin). You’ll still contact emergency services, but your BFF’s won’t be notified.
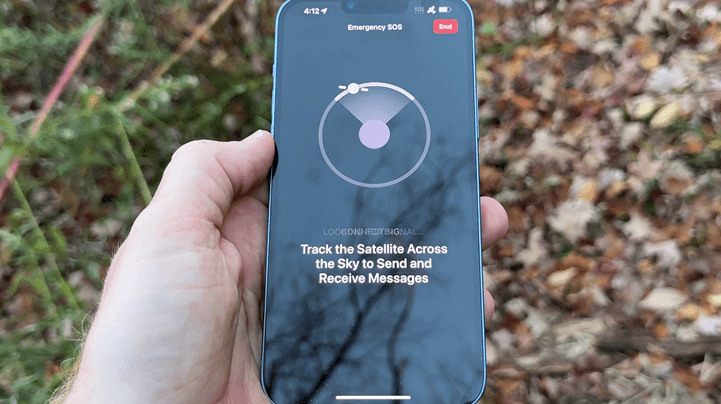
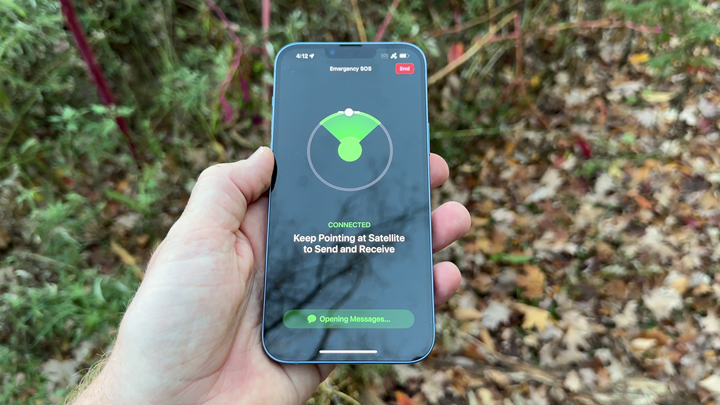
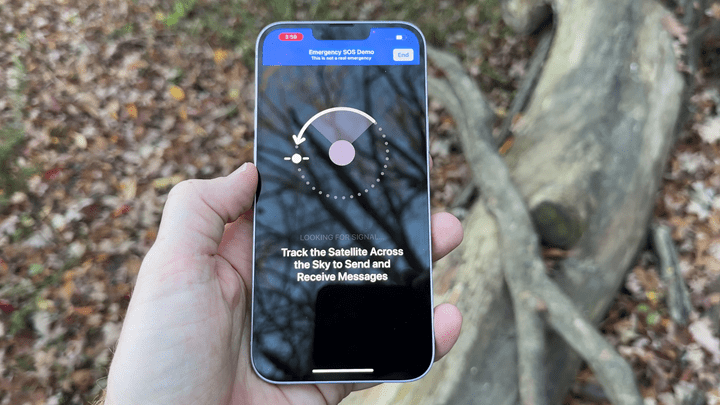
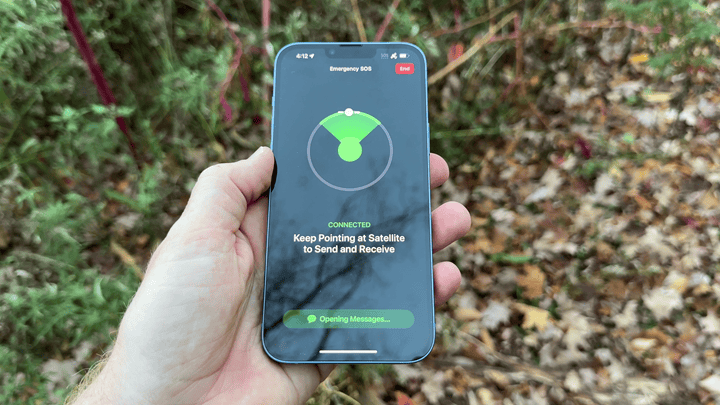
After pressing confirm, you’ll get to this satellite pointer screen. As noted, there are some 24 satellites as part of the constellation, and they are constantly criss-crossing overhead. So you need to point your phone towards them in order to get the best connection (more on what happens if you don’t, in a moment). As you move your phone, it’ll keep it within the green area:
You don’t need to wave your phone above your head, or anything else. Just keep your phone flat like you’d be scrolling Instagram, and instead rotate your body/phone till it shows green. It’s really simple. It showed up in under 20 seconds in my case:
What you’ll find while hanging out having an emergency, is that the 24 satellites slowly move over the course of a couple of minutes. So you may be facing one direction when you start, and then facing another a few minutes later. And then a satellite will disappear entirely and a new one will show up, and it’ll tell you to turn a different direction. Apple says it’ll even tell you how many minutes you might need to wait till the next one. They say that at continental US latitudes, it should be near-constant coverage, whereas far further north, it might be a few minutes between satellites.
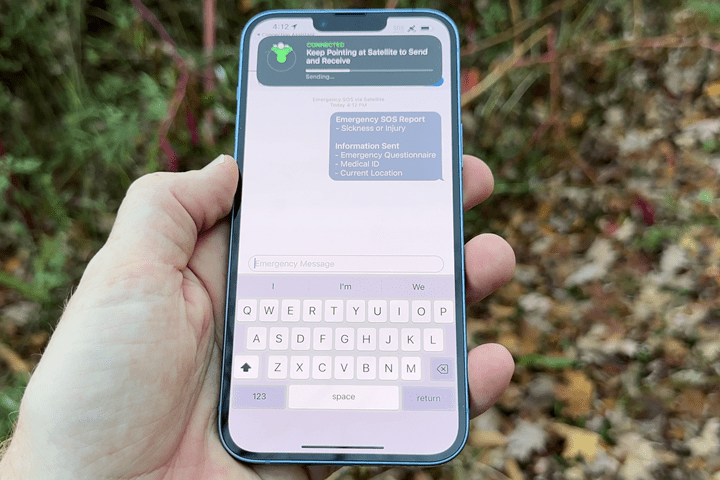
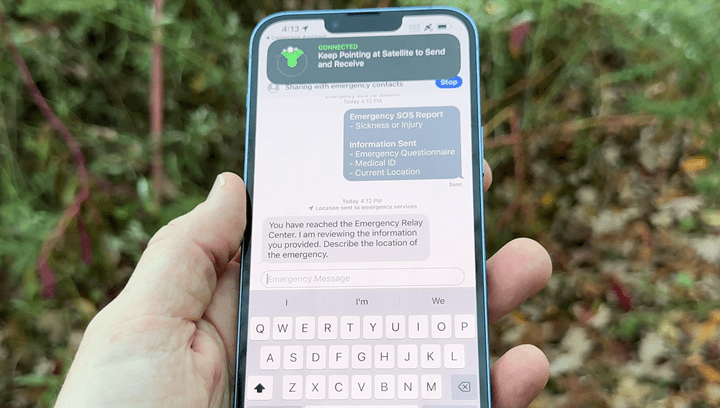
Once all that was set, it started sending the message. That message includes:
– Your contact details
– Your current location
– Your current altitude
– Any Medical ID information listed on your phone
You’ll see the status of a message being sent at the top, as well as the current satellite connectivity status too. You can either hide this or make it bigger by tapping on it.
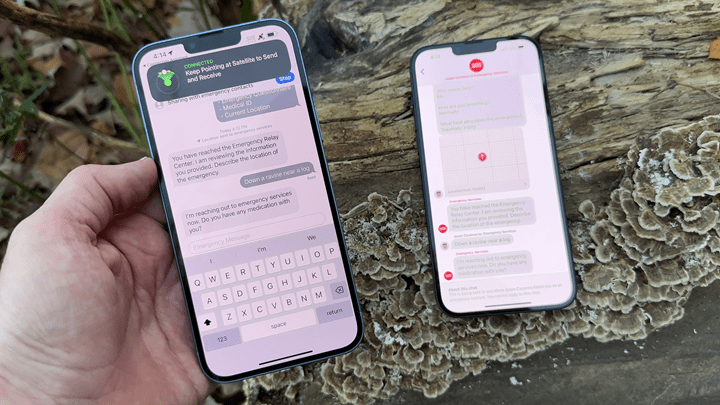
The emergency relay center responded within a few seconds of the message sending (which at first only took maybe 30 seconds), asking for more information about my location/situation:
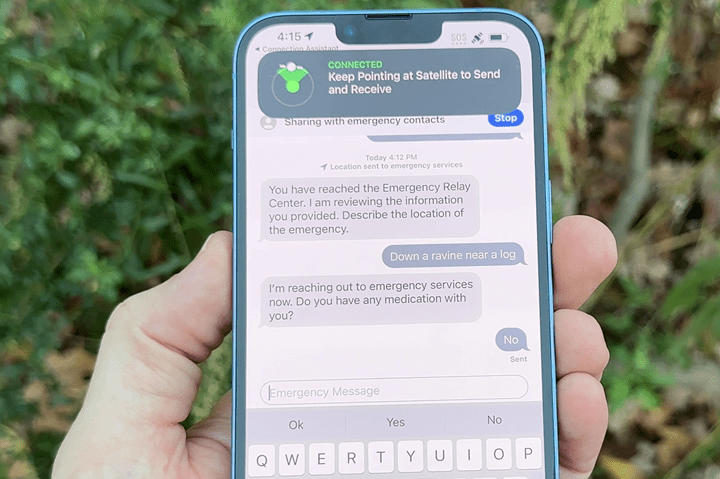
This text message is with a real human. It’s a real Apple relay center operator, or, if your specific region supports it, then it’d be directly with the PSAP (public safety answering point) in your area. Basically, the 911 operators in your area.
I then gave more information, and they volleyed back as well.
In an earlier test of this, prior to saying I was stuck in a ravine, I specified a stroke had occurred. This caused a different set of responses from the person on the other end, asking if the person having the stroke had a history of strokes, as well as other relevant questions.
Now, around now, the satellite disappeared on me, and thus I had to rotate again. This second set of messages took perhaps 2 minutes to send under relatively light tree cover. Other times it was near-instant. Again, really depends on what’s in the way.
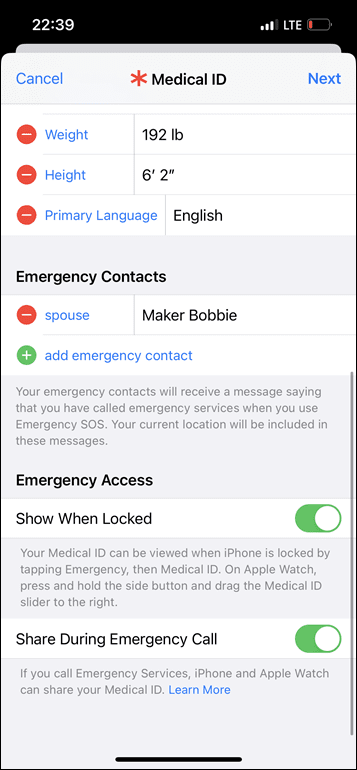
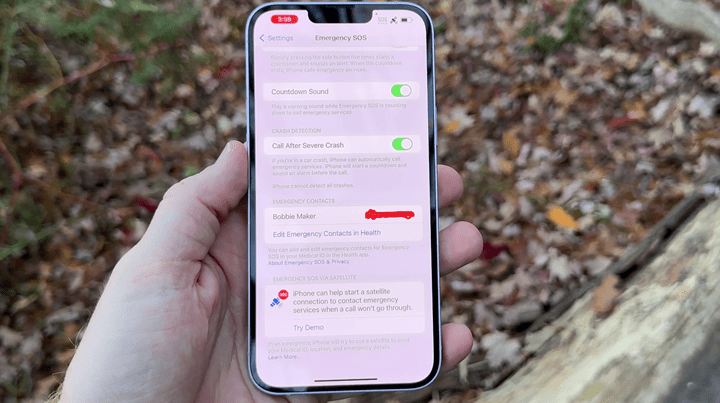
Now, while all this is happening, it’s also notified your predefined emergency contact on your phone. This would be a good time to (right now), double check you’ve actually filled this out. It’s located at Settings > Emergency SOS > Set Up Emergency Contacts in Health > Create Medical ID, then simply follow the steps. I promise, it takes under 60 seconds, and is useful beyond satellite SOS. Be sure to check the very last box for “Share During Emergency Call”
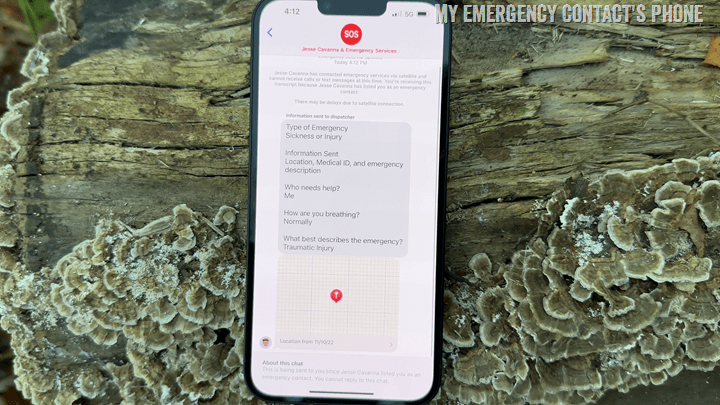
However, what’s super cool here is that from this point forward, *EVERY TEXT* you send to the emergency responders, as well as every message they send you, is mirrored to your emergency contact. They basically get to watch a livestream of this event. They also receive your exact GPS coordinates too.
In fact, the emergency relay center responses actually showed up slightly faster on my emergency contacts phone, which is logical given that was on cellular. Note that this is all ‘read-only’, your emergency contact cannot be active in the conversation.
Now – Apple says that the main limitation here is that the antenna to satellite connection simply isn’t as strong as dedicated satellite devices, for example a Garmin inReach or SPOT tracker. As such, things like trees will impact it more and slow it down. The heavier the foliage, the slower the service. Same goes for mountains, or even hills – all of which could block access to a specific portion of the sky, where you’ll have to wait for a satellite to swing past the visible portion of the sky.
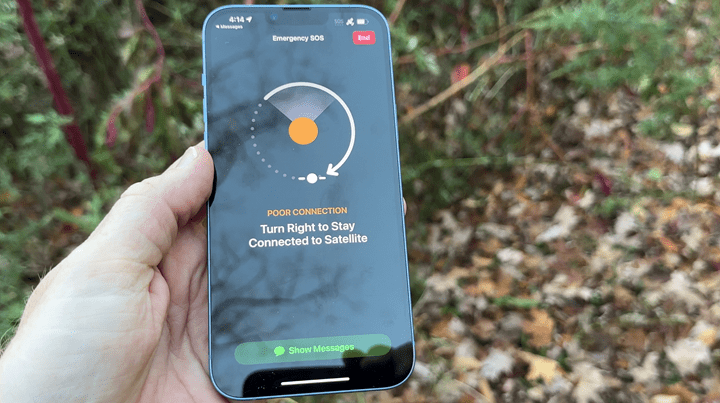
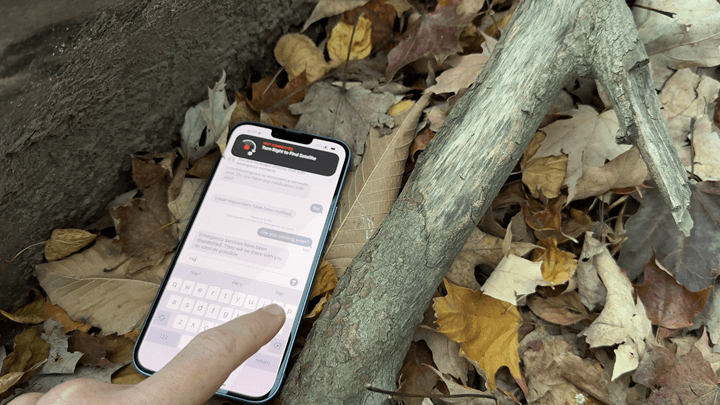
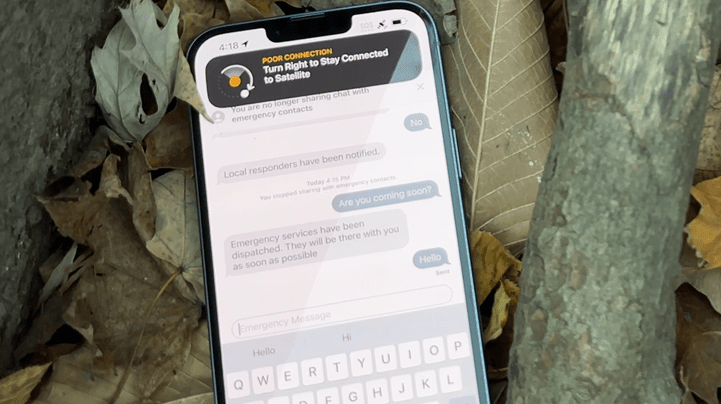
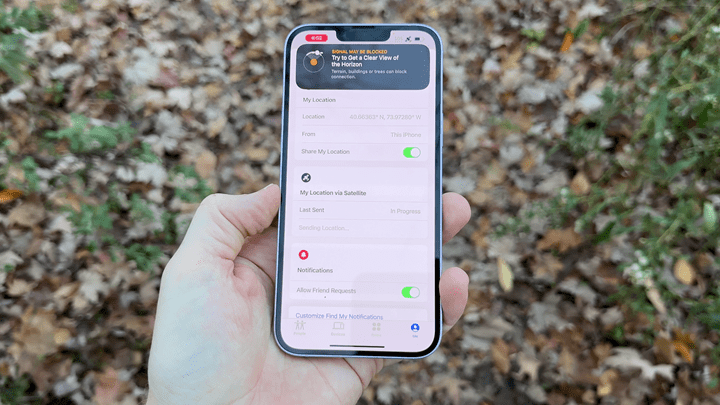
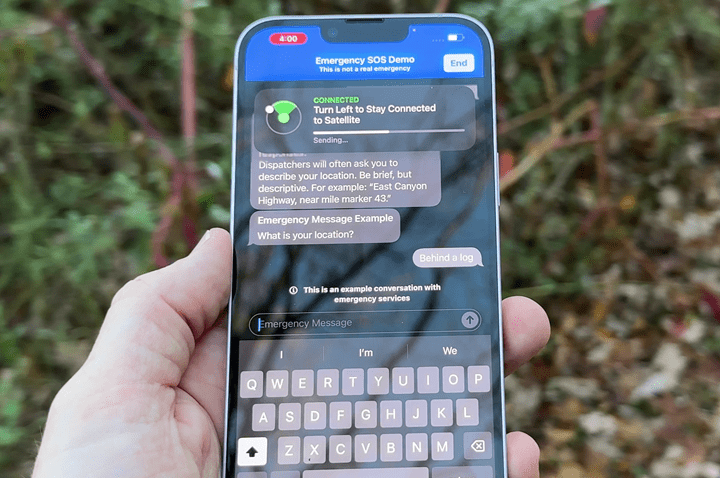
To test this, I stuck the phone down under the edge of a log. And then faced it the wrong way from the satellite it was chatting with. As expected, it got unhappy:
However, it kept trying to send the message. And within about 3 minutes it managed to send the message. So while there is a ‘best’ way to position the phone for optimal performance, the reality is it’s going to keep trying. Apple themselves even notes that if the situation requires, you can simply place it on a surface and let it do its thing. What’s fascinating here is that I never moved the phone from the above position. Instead, the satellites moved around me, and thus, into poor, but workable satellite connectivity – and the message sent as you see below:
Finally, it’s worth knowing that there are actually four ways a satellite SOS message gets triggered. The last three outlined below are all existing ways to notify 911 on your phone, and they’ve now been integrated into this system as well.
A) The manual process I just describe above
B) Manually holding the top two buttons until it triggers an emergency
C) Automatic Vehicle accident detection
D) Fall Detection
In the case of B/C/D above, since the type of emergency is already pre-defined by nature of it being automated, it’ll go through the same process as above, but immediately start connectivity, and continue trying to reach satellites ‘forever’ unless canceled. Basically, even if the phone is in your pocket or on a car mount while you’re unconscious, there’s a chance that it’ll eventually get coverage by a passing satellite, and keeps trying. There’s currently no low-battery cutoff for that, it’ll keep doing it in the foreground. Remember of course, if you’re within cellular range, it’ll simply use that as normal.
FindMy Tracking:
Next, this one will be a quick section – cause, it’s pretty straightforward. In addition to all the emergency bits, there’s actually one non-emergency piece, which is the ability to manually update your FindMy location. For those with Apple devices, FindMy normally uses cellular/WiFi to constantly show the location of the person and their devices (be it phone/watch/computer/AirTag/etc…). FindMy locations can be shared with family members, so they can see your location.
With satellite connectivity, you can manually update your FindMy location, which lets your family members see your current spot. This is great for camping or other out of cell scenarios where it’s not at all an emergency, but you basically want to show/share your location – perhaps as you arrive for the night at your campsite. Or, just simply checking along the way.
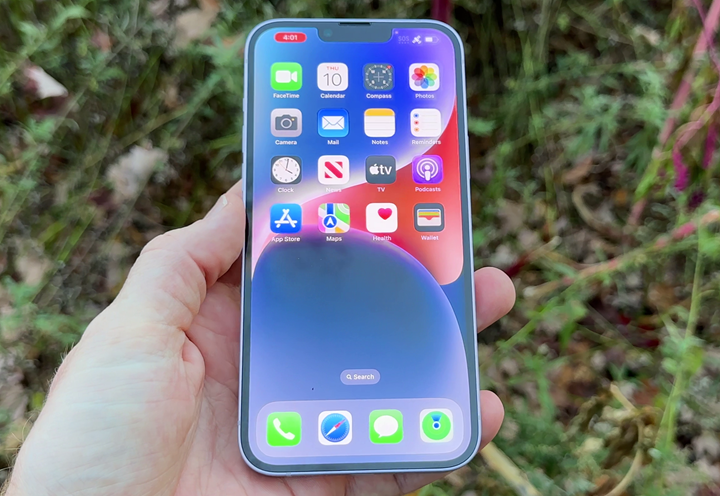
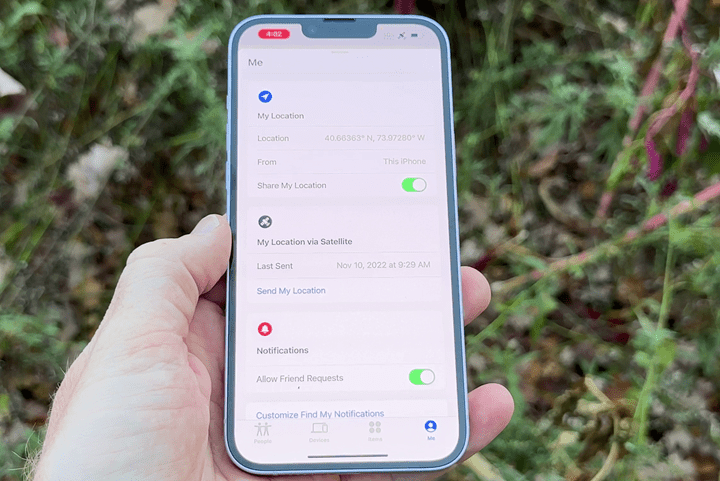
To do this, you’ll crack open the FindMy app (lower right hand corner here):
And then you can choose to manually update by selecting “Send My Location”, within the satellite section:
You’ll get the same manual satellite positioning bit as with the emergency pieces, and then it’ll show you that the message is sent. In my case, I seemed to be between two different satellite passes, so had to do a bit of the satellite movement dance, and all-in it took about 3 minutes. A previous time it took mere seconds. Again, just depends on the satellite situation above you.
Once that’s done, you can put down your phone as normal. Note that if you then travel through a cellular area, it’ll re-update that with the latest location via cellular. For example, I’ve done some hikes in the last couple of months that had spotty cell-phone coverage. So it’ll leverage cellular as normal, but then I can manually update via satellite as needed.
There is no automatic update via satellite, it’s only when manually triggered. Further, there’s no option to add any informational context here, which would be a huge update if Apple simply had a list of predefined messages to include, such as “At Campsite for Night”, “Still on Trail”, “A bit behind, but all’s good”, or such. This is what other platforms have, which makes it easy to choose from a list of predefined messages, minimizing bandwidth while significantly expanding use. Because these messages are predefined beforehand, the bandwidth to send them can literally be only one or two characters/numerals out of a stream that otherwise includes GPS coordinates and more.
Though given all the other weird FindMy limitations Apple has (such as inability to share AirTag device locations with members of your Apple ‘Family’), I’m not holding my breath. Nonetheless, the FindMy satellite update feature is super useful if you don’t have a satellite device, simply to update friends/family on your location/progress.
Demo Mode:
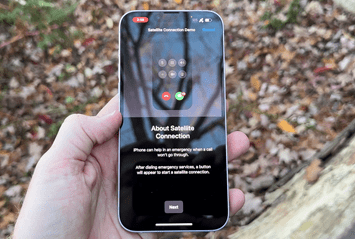
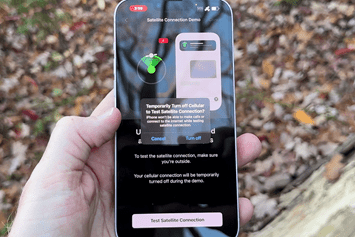
Being that humans are curious creatures, and being that Apple knows people want to try this out, they’ve actually created a demo mode. This demo mode uses the legit satellite to send test messages back and forth, letting you figure out exactly what service availability looks like in varying conditions. You can go through the emergency questionnaire, try out pointing at satellites, and even see response times via satellite from the relay center (the replies are automated from the relay center, but traverse via satellite).
To open the demo up, you’ll go into Settings > Emergency SOS > Try Demo (at the bottom):
It’ll warn you that it’s going to shut off cellular and WiFi. So obviously, if you’re expecting an important call or text message, this isn’t the time to do this.
However, unlike before, it doesn’t let you answer the questions. Perhaps that’s to avoid confusion in the event of a real emergency. Instead, you funnel directly into moving your phone around to find satellites:
At the end of which, it’ll send all this information to the relay center, and you’ll see the satellite positioning bits as well as response times. If you stick the phone in a hole in the ground, these messages won’t come through. If you’ve got poor coverage, you’ll see poor response times. All of this is, again, happening via the real satellite system. This isn’t faked. The only thing faked here is the responses from the relay center are automated, but are indeed coming from that relay center system.
This is super cool for Apple to do this. Though, we’ve seen other platforms have similar concepts. For example, with Garmin inReach, you can send test messages to the relay center, which lets you validate things are working correctly. Still, given the massive scale Apple is looking at here (eventually hundreds of millions of users), being able to have a demo mode is key to letting people understand how the system works.
Also, secondary reminder to update your medical/emergency contact information if you haven’t done so already.
Wrap-Up:
I suspect in 5-10 years, or even 20 years, this will become one of the most pivotal points in the history of not just the iPhone, but Apple. It can’t be overstated how big a deal this is. Over time this will basically put satellite emergency response in the pocket of every person with an iPhone. And while there are other services being planned (such as one from T-Mobile), that’s got both highly fuzzy timelines and is also just one carrier. Undoubtedly it’ll eventually become available, and probably from plenty of other carriers too. But the Apple solution is real, and it’s here today, with the first international expansion plans already set for next month.
Of course, as noted, this isn’t a direct replacement for a satellite communicator device if you’re headed deep into no-cell zones and need or want constant tracking. When I go hiking in no-cell areas, I’m still absolutely going to take my Garmin inReach device. That provides constant non-emergency tracking at specified intervals (down to every 2 minutes), and it works everywhere on the planet. I can send messages back and forth, just like texting, to friends/family, and with a variety of updates. It’s not limited by my location, nor is it limited in what I send. But, it does cost money for the secondary device, and also costs money for a subscription plan.
For now, the Apple solution is free. Apple says it’ll be free for the first 2 years, but hasn’t defined costs after that. Speaking of which, the exact definition of the two years is a combination of the date of activation of your iPhone 14 combined with the date of availability in your home country. So for a US-activated phone, that’d be starting today, November 15th, 2022, until November 15, 2024. For someone in France, that’d be December 2022 until December 2024. For me in the Netherlands, since it’s not yet activated there, I’ll get a free pass for my start date till it’s activated there. So if that were March 2023, then I’d get till March 2025 for free. But I could use it in USA/France/Canada/etc for free before then. And to be clear, that ‘March’ date is purely an example. I have no idea when it’ll be available in the Netherlands.
Thus it’ll be interesting what this ends up costing down the road, though, I suspect it’ll be bundled as part of one of Apple’s subscription services, or be a relatively trivial cost. Apple hasn’t said either way. However, what will be fascinating to watch is just how fast Apple can roll this out, how well that roll-out goes (invariably there will be bumps, but the tolerance for bumps is low in life or death situations), and how well they can scale it beyond North America and Europe.
With that – thanks for reading!


0 Commentaires