Long before the Garmin Epix (2nd gen) or Fenix 7 came out, Garmin has been selling maps. In fact, they’ve been selling maps for basically their entire existence. Lately these things are built into devices, but it wasn’t that long ago that if you wanted extra maps on a Garmin device you had to buy it separately.
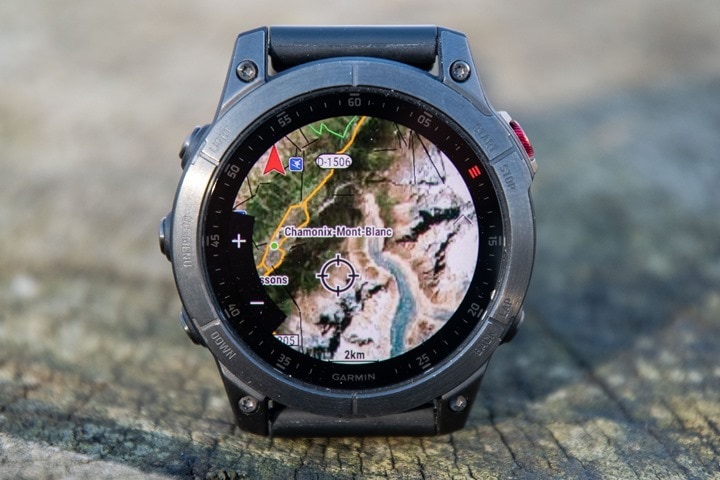
But one of the neat things you can do with this map-buying-prowess is put satellite imagery maps onto the Garmin Epix and Fenix 7 series. In fact, you can also do it on the Fenix 6 watch. Neither are officially supported (listed as a compatible device), but all these units work just fine and people have been using them for years. Some suspect the reason it was removed from official compatibility is that the map experience with the lower resolution Fenix 6/Fenix 7 displays may not always be great. But the Epix has far greater resolution and pixels per inch – at 326ppi versus 200ppi on the Fenix 7 series. So, things simply look better now.
The main reason you’d want to use satellite maps over the included regular maps is for areas where the regular maps aren’t as useful. For example, along coastlines or near water, where important wet/dry details tend to fuzzy. Same goes if you’re off-trail entirely, and trying to figure out if you can cut across a vast swath of land, or if perhaps just out of sigh are impassable rocks/marshes/etc… There’s countless uses for it.
In any case, you can do this on the Fenix 6 Pro, Fenix 7 (all variants), and Epix units (as well as even the Fenix 5 Plus series and original Fenix 5X). And doing so is easy – assuming you’ve got a computer (Mac or PC), and your charging cable nearby.
Downloading It:
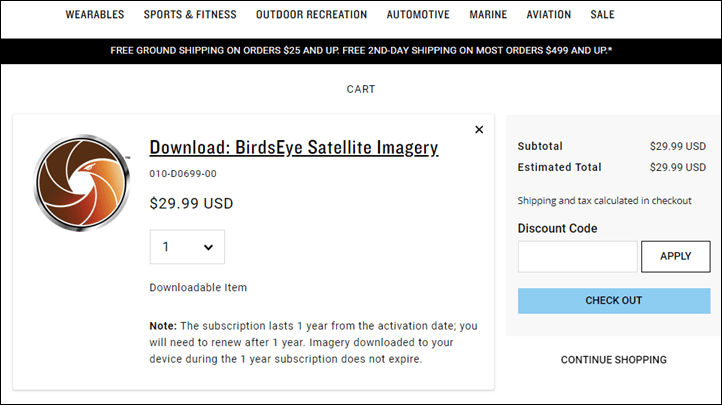
First up, you need to go and buy a Garmin Birdseye Imagery Subscription. It costs $29/year, and gets you unlimited maps during that period, for anywhere in the world. It links to a single device. Also, any maps you download during that subscription year remain valid on your device even if you unsubscribe.
So starting there, simply follow the purchase steps from this page:
Once you’re done paying, you’ll get a few different e-mails over the course of a few minutes. It’s not instant, it takes like 5-15 minutes. Next, if you haven’t registered your device yet (e.g. paired it up to a phone or computer), you need to do so. It’s pretty likely you have already done so – but if not do that first.
Then, you need to download Garmin BaseCamp. This is part of their “Basecamp is Old and Stinky Software” series of desktop products (aka BOSS). It’s been around for longer than the Fenix series has existed, and allows transfer of routes, waypoints, and maps to devices (originally for handheld devices). Normally for most newer maps you’d use Garmin Express or on the Fenix 7/Epix series even the watch itself. But BaseCamp was designed for the handheld era, and apparently nobody remembered this software is still there.
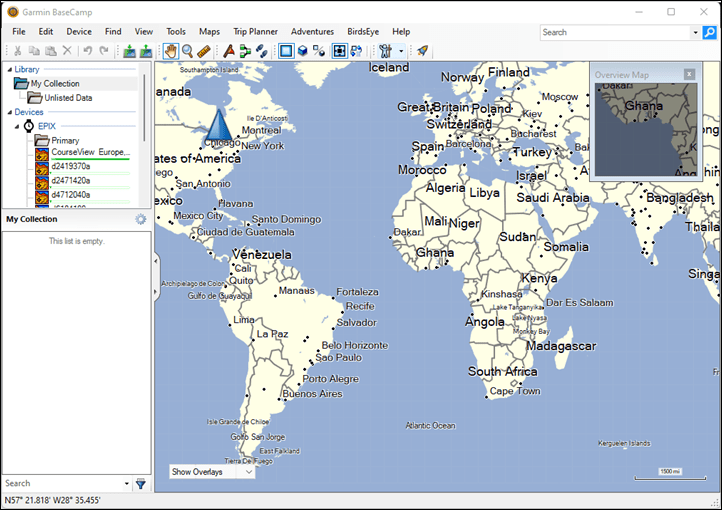
Once downloaded and installed, you’ll be staring straight into the face of 2008 user interface design and culture (another 2008 offering):
If you haven’t yet, go ahead and plug your watch in (yes, using this stand makes this seem even more BOSS-like):
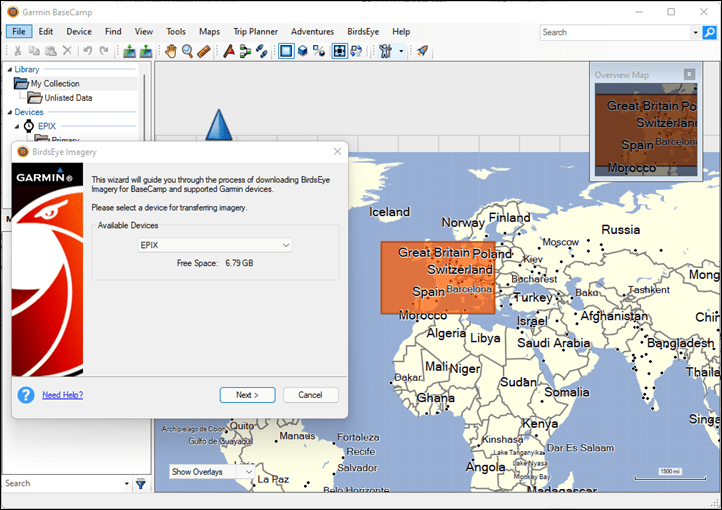
Then, at the top menu, select ‘Birdseye’, then ‘Download Birdseye Imagery’. That’ll bring you here, which shows your Garmin Epix (or Fenix 6/7):
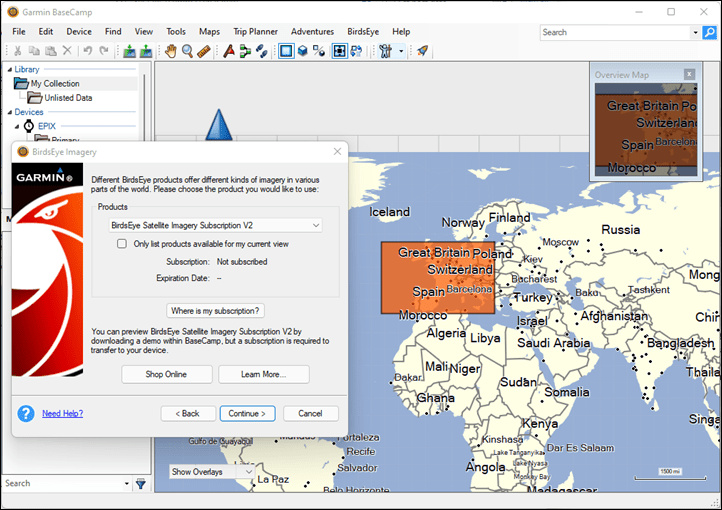
Click next again, and you you’ll see the Birdseye product automatically populated, but then click on ‘Where is my Subscription’ to sign-in and get your account validated (so you can see the purchase you did above). The username you’ll enter is your e-mail address. Remember, the BOSS software is so old it’s from an era where Garmin Connect used usernames, not e-mail addresses.
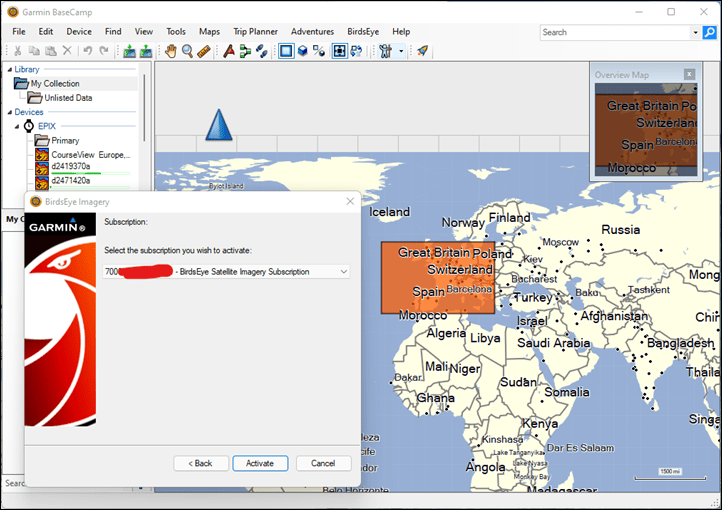
Once you’ve signed in, you’ll see your subscription listed, click the ‘Activate’ button to get it excited:
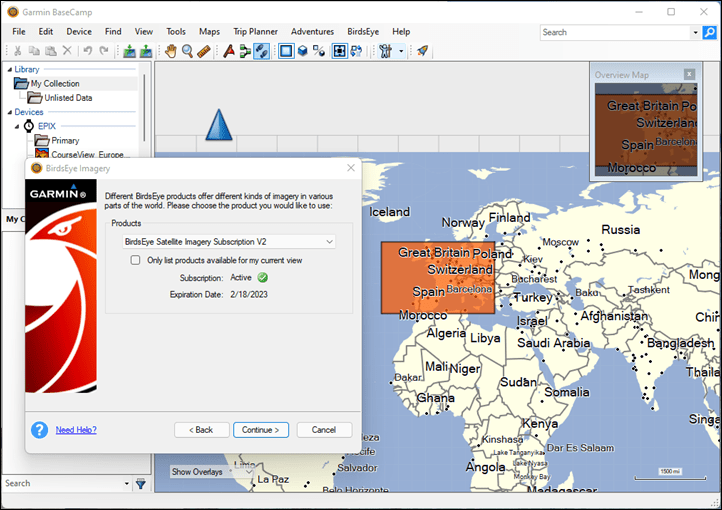
Once you’ve done that, it’ll give you a success message, and then another confirmation dialogue indicating your mission is mostly accomplished:
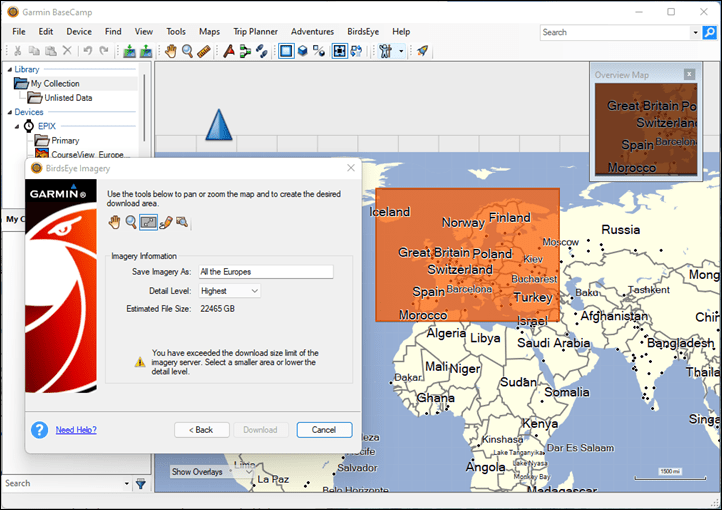
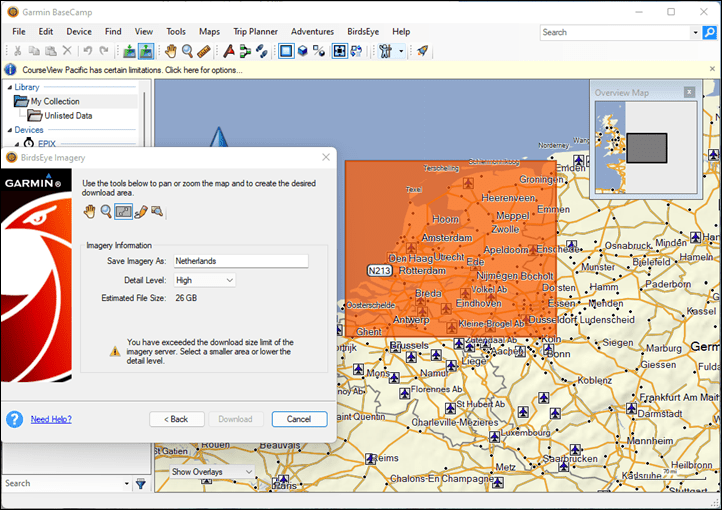
Now, comes the good part! Choosing the area you want to download. You’ll see how you can use the little map zooming tool in orange to highlight a region. But remember, satellite imagery is huge in terms of size. So downloading all of Europe like this would take a whopping 22,465GB, also known as 22 Terabytes, which is approximately…well…way more storage than you have on your little 16-32GB Epix/Fenix units.
You can use the little icons to zoom in/out (magnifying glass), move around (hand), and either draw a square or free-form. You can see that even if I select the whole Netherlands, that’s still some 26GB at the high level (but 74GB at highest). If I reduce that to the standard, it’s about 1GB.
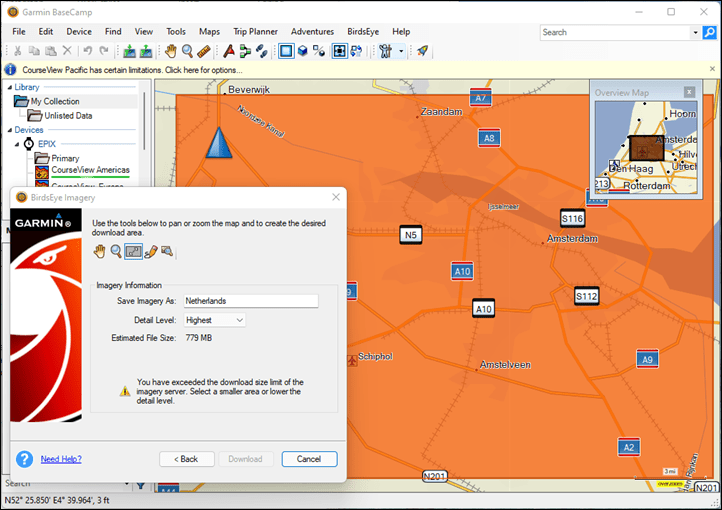
But standard is no fun, so I’m going to zoom into just Amsterdam, and there we go – far better, at the highest it’s about 779MB (just under 1GB) and easily fits. If you were hiking in a region, you could easily make a more finite circle around the area you needed and easily make it fit.
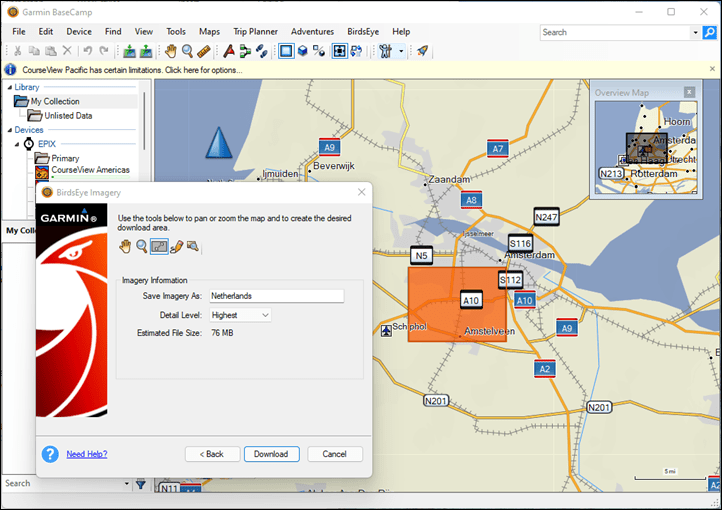
Except, wait – it says I’ve exceeded the download limit of the server. Because again, 1997 BOSS. This was apparently the era of dial-up modems. The exact limit seems to vary based on which setting you choose. So at the ‘Highest’ setting, it appears limited to about 76MB, whereas the ‘High’ setting is 107MB, and the standard setting you can go super big. Except, not always. It’s also about the underlying tiles, so in some places you’ll get far higher levels. For example later on I download the area around Chamonix (Alps in France), and easily clear over 200MB on the highest setting.
Anyways, now I’m ready to download:
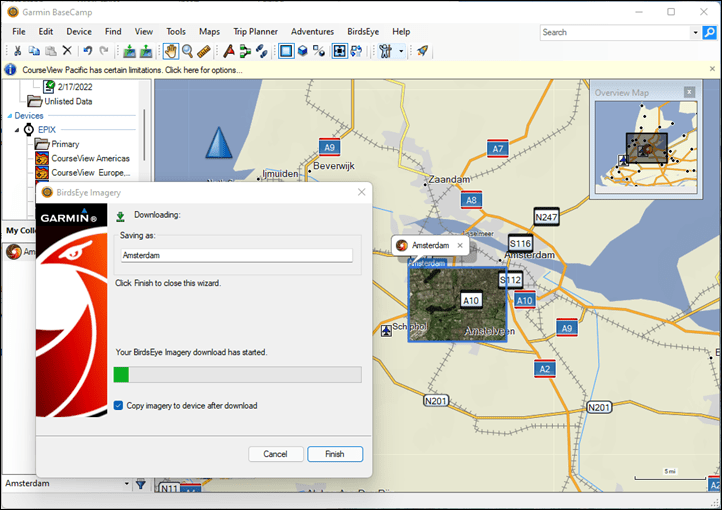
It’ll download everything, and if you didn’t give it a name, you can do so as well. You should hear the dial-up model starting in your computer. It’ll take about that long to download this 76MB map. Check that ‘Copy maps to device’ box, so once it’s done next week, it’ll at least have copied the maps too. that’ll be the quick part.
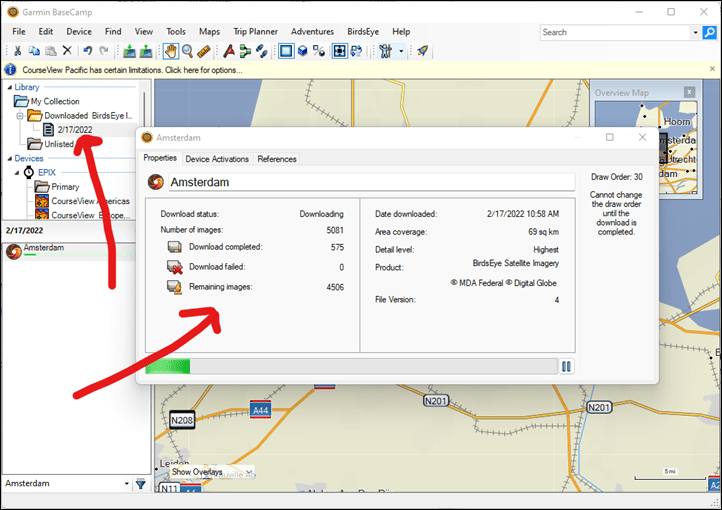
If you tap finish, you can double-click on the map name you created to see this nifty screen showing, where you can watch map tiles download, mentally envisioning Tetris pieces falling:
No really, this entire thing took about 45 minutes to download this 76MB. And no, it’s not my internet – I average speeds of about 500 Mbps here at the DCR Cave, meaning in a best case scenario it should take approximately 1.216 seconds to download a 76MB file, and a worst case scenario 2 seconds. Obviously, this is more about the design of how files are downloaded for Birdseye imagery.
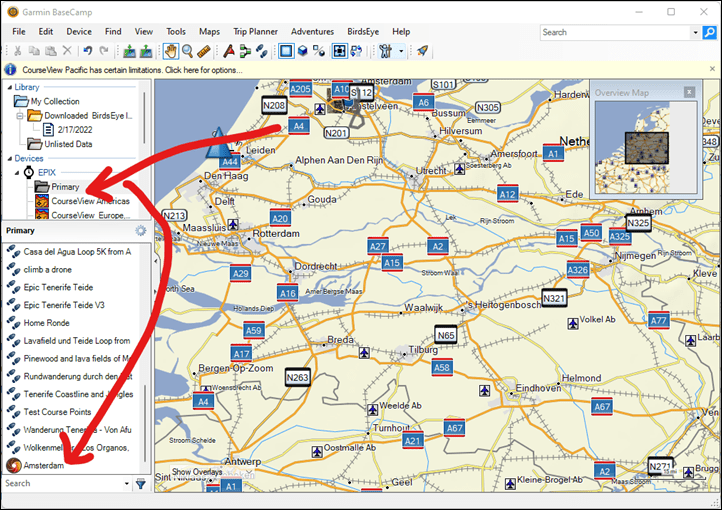
You can double-check everything copied by looking at the ‘Primary’ folder under your device, and then likely scrolling to the bottom:
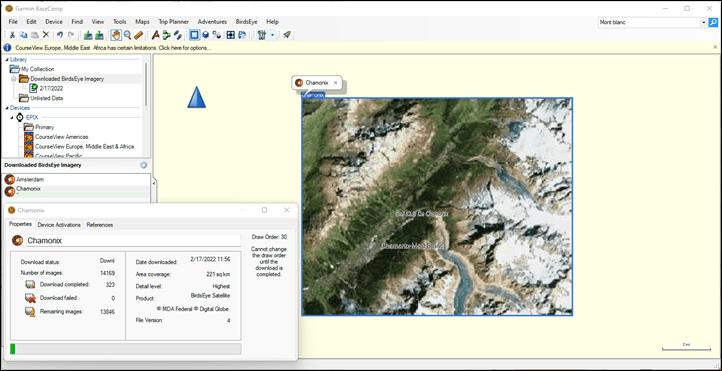
Further, you can repeat this process for as many areas as you’d like. I went along after and added some imagery for Chamonix as well. Though this time it allowed me to download a 220MB section on ‘Highest’, demonstrating it’s all about the underlying tiles. This one took 1hr 31mins to download.
With that, you’re ready to use it – so go ahead and disconnect your watch from the computer.
Using it:
Good news! This section is trivially easy. You just use your watch as normal.
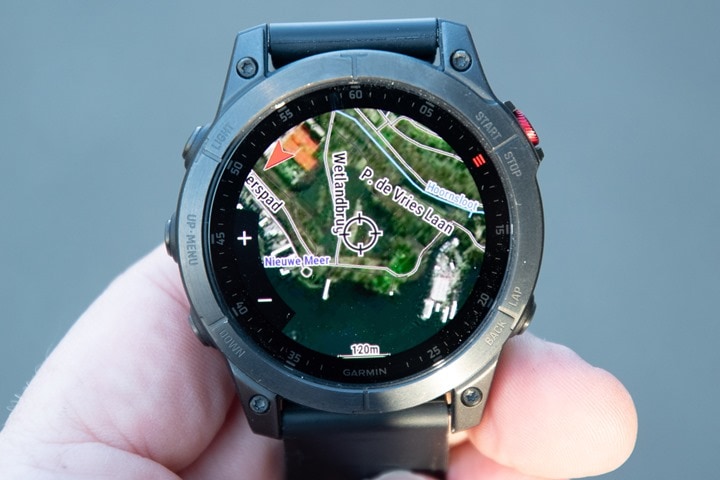
By default, Garmin will load the Birdseye Imagery for any areas you’ve downloaded. But what’s cool is that they’ll also automatically overlay the trail/road/route imagery over the top of that. You can see this below here:
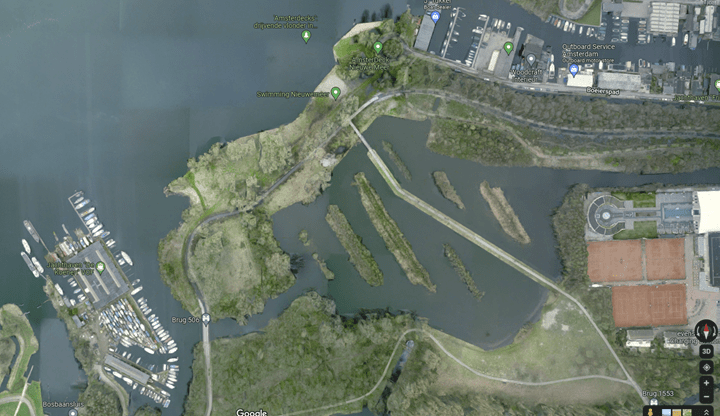
As you can see, the quality here is generally pretty good, but not as detailed as you’d find if looking on a computer or phone. For example, I can roughly guess that there are boat docks above, but you can see it’s not as sharp as the actual imagery if I look on Google Maps or such (below, but upside-down). And while these are certainly different sized images, even when fully zoomed in on the Garmin satellite maps.
Still, depending on what you’re using this for, it’s still more than useful in most cases. I find satellite imagery super helpful in trying to figure out areas of tree cover (or not), or rough ideas on where snow covered trails might be in summer (since mountain satellite imagery tends to be taken in the summer, so you can usually figure out where glaciers/etc might be). Same goes for many coastal areas where non-satellite maps aren’t super useful for finding the edges of water or small islands. As always, there are plenty more uses here.
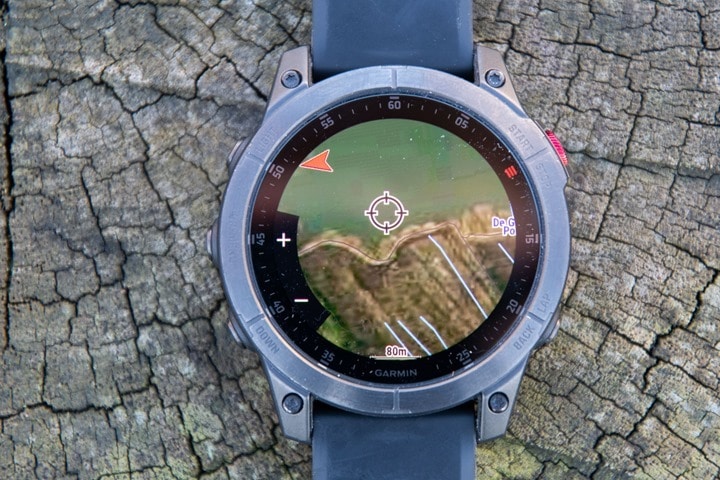
For example, here’s the edge of a marsh area I often run in:
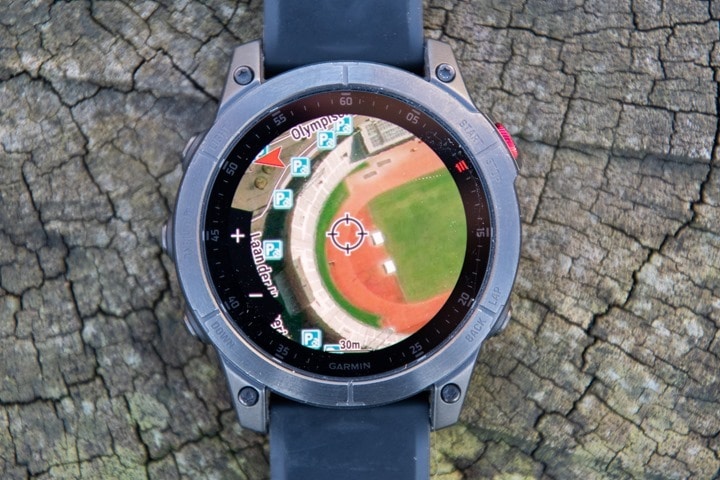
And for fun, here’s Olympic Stadium:
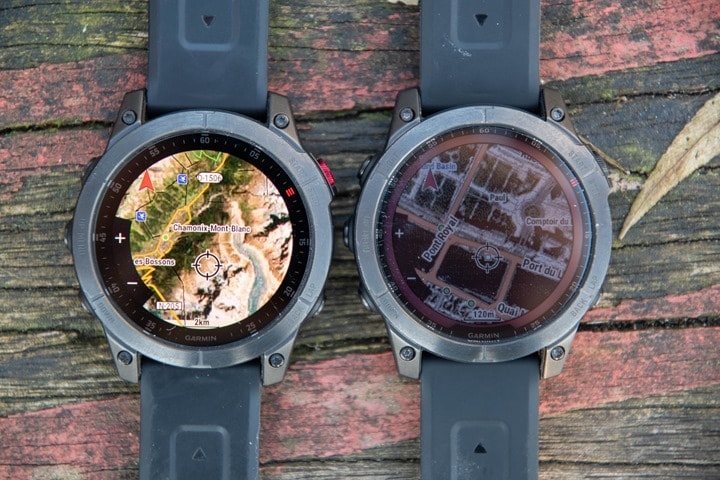
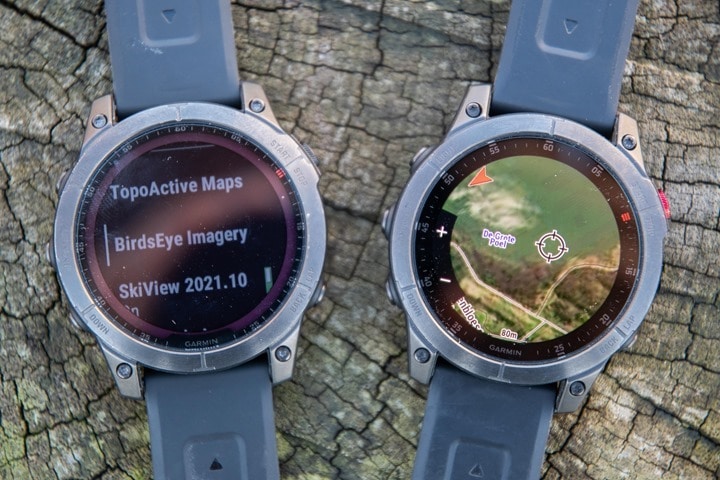
And here’s Epix and the Fenix 7 side by side, obviously, in very different area (French Alps vs Paris):
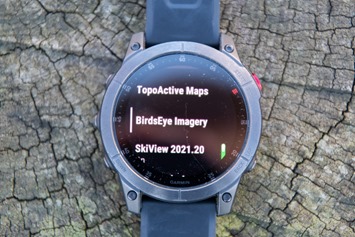
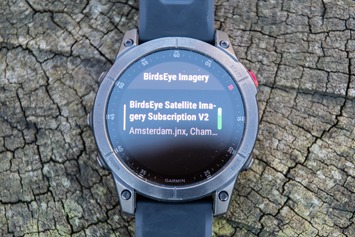
Now, if you want to turn off the Birdseye layer (or, the trails layer), you can do so in the maps options for that particular sport profile. Once in that profile, access the settings by long-holding the middle-left button. Then scroll to ‘Map Settings’ > ‘Map’ > ‘Configure Maps’ > ‘BirdsEye Imagery’ > and then toggle either on or off.
Note that it’s all or nothing here, so either all your regions go on or off. If you backed-up one level, you’ll see the same option for ‘TopoActive Maps’, which do allow toggling it per-region (e.g. North America ,Europe, etc…).
All the core features like routing and popularity and such are all the same here, since they’re leveraging that detailed TopoActive map layer. So none of that changes. Undoubtedly there’s a battery hit to using the Birdseye maps versus TopoActive maps, but I haven’t calculated that at this point.
Wrap-Up:
It’s cool that this is an option, both in terms of being able to download satellite maps for anywhere in the world, as well as being able to toggle these layers on and off, within the device itself. Plus, with the 16-32GB of storage, you can load quite a bit of satellite imagery, depending on the exact detail level you choose, and how particular you get with that download area creation tool.
Of course, I think it’s also clear that Garmin probably needs to look at overhauling some of this stuff. As more and more of their units get AMOLED displays over the coming years, peoples interest will increase here. And this is an easy $30-annual subscription in terms of revenue for them. Plus, it’d benefit all of the existing handheld and Edge cycling devices that already support this today (almost all of them). Moving this type of feature to be smartphone based using WiFi to download maps, with speeds that represent this decade is something I hope is on some internal roadmap to get done.
Certainly, we aren’t all going to be using BaseCamp forever. Or at least, this version of it. I suspect this would fit well within the Garmin Explore app, and there seems to be hints about variants of that app allowing Birdseye imagery download (based on looking at the baked-in version on their new Overlander device). The Explore app has recently seen it’s duties expanded to accommodate Garmin’s inReach Mini 2 connectivity, so perhaps more is on the way.
Either way, as with many other Garmin things, this feature will likely be used by less than 1% of the Fenix users. But for that sub-1%, it’s incredibly useful. And, as I’ve said before – that’s ultimately what’s made Garmin so successful – finding everyone’s own 1% feature.
With that – thanks for reading!

0 Commentaires